How to Create Categories and Pages in WordPress?
Thanks to the sleek user interface, easy to use tools, presence of amazing plug-ins and themes, setting up a website with WordPress is just a cakewalk. If you’re creating a blog with WordPress, the first step is installing the theme and necessary plug-ins. Now, before you start publishing posts, make sure to create the right categories and pages for your website. Categorizing all the posts is important for easy user navigation, whereas, it’s almost necessary to create the correct pages in your WordPress website for a better user experience.
Administrator Access
Before you start creating categories or pages, make sure that your account in the WordPress site has the required administrator access. How do you assure that?
When you first install WordPress, you must have created a new account (You cannot skip this, that’s mandatory to complete the installation process). This new account automatically has the administrator access. If you want to create a new account and provide that administrator access, below are the steps to follow (I am using WordPress 3.1 for this example, so the user interface you see in the screenshots may be a bit different from yours):
- Click on the “Add New” link after logging in to your WordPress account.
- Fill in the required details and choose the role as Administrator (Please refer to the screenshot below if you face any problem) and click on Add new user. You’re done!
Creating Categories
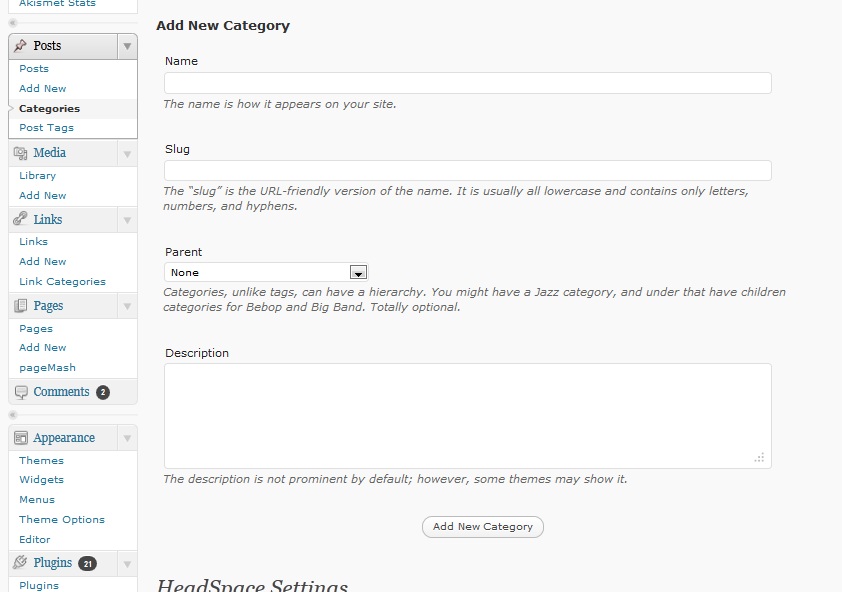
- After you log in to your WordPress account, you should see “Categories” link on the left pane, just like the screenshot below.
- Now, Add name of the category, slug (This is URL friendly version of your category, suppose, you set slug of category “Pictures” as “pics,” now, link to that category will be:” www.yourdomainname.com/category/pics”), parent (Choose an existing category from the drop down list, only if you want the new category to be a sub category under that existing category) and description (This is not mandatory, fill this for easier reference at a later time only).
- Now, click on “Add New Category” button and you have created your new category.
- See the new category displayed on the right side of the same screen with proper hierarchy.
Creating Pages
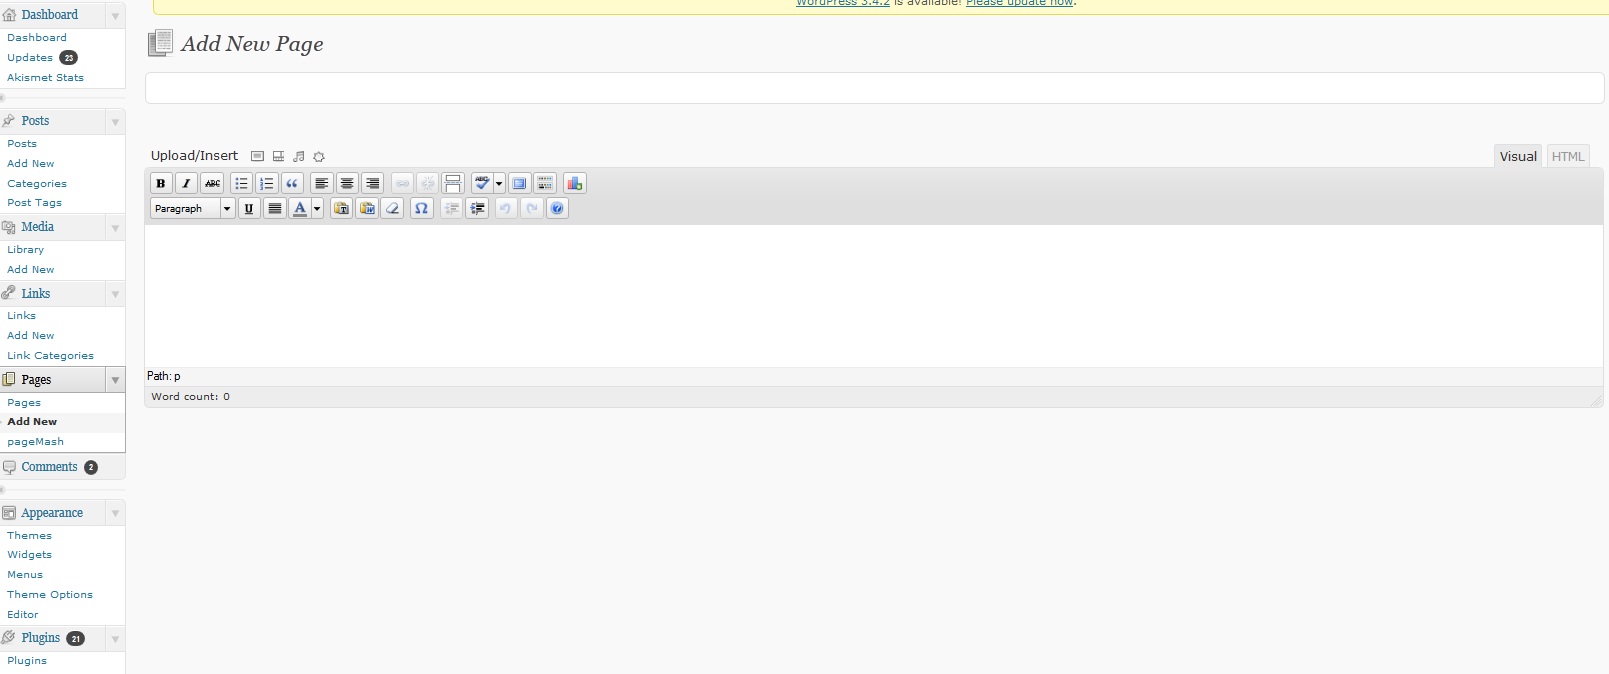
- Click on “Add New Page” link on the left pane.
- You should enter the title of the page first. In the body part, enter whatever text you wish to be displayed, add images or videos as needed. You can refer to the screenshot below for easier reference.
- If you wish, you can add tags for your WordPress page as well.
- Set visibility for the new page to be created. If you set it public, it is visible to all. If you set password protected, only people with the proper password will be able to access the website. If you set it to be private, the page will not display on the homepage of your website. Only the visitors with the permalink to the page will be able to see it.
- You can set parent of the new page from the drop down just like category. Select if you want the default layout for the page to be used or not. Also, put the order you want this page to be placed.
- You can publish the page immediately or can save it as draft for future review as well.
- You can access all the created pages from “Pages” link on the left pane.
Creating a category or page in WordPress is not a tough task and with the aforementioned steps, it should be pretty easy for you, even if you have never used WordPress before. If you face any problem, don’t hesitate to let me know through the comments section though.


